Azure Dev Journey: Setup an account
Step by step
In previous posts we learned:
- The importance of Cloud computing
- Who’re the main players on the market
- Azure Developer roadmap
In this post we will setup an account and familiarize ourselves with the different ways we can access Azure services.
Accessing Azure Services
There are multiple ways we interact with Azure services
- Azure portal - web-based, unified console that lets you create and manage all your Azure resources. You can build, manage, and monitor everything from simple web apps to complex cloud deployments in the portal using GUI.
- Azure Cloud Shell - an interactive, authenticated, browser-accessible terminal for managing Azure resources without having to setup and manage command line tool on our machine.
- Azure CLI - The Azure command-line interface designed to access Azure resources quickly and for automation. Available across Azure services. It allows execution of command through interactive cli prompts or a script.
- Azure PowerShell - a collection of modules for managing Azure resources from PowerShell.
- SDKs - a collections of libraries built to make it easier to use Azure services from your language of choice.
There is even Azure mobile app where you can monitor your resources, access Azure Cloud Shell and take corrective actions if needed.
In the next section find out how you can create an account and navigate through the portal.
Account setup
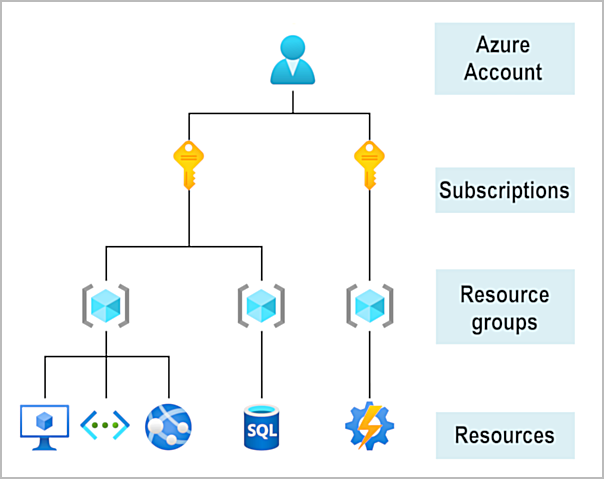
To be able to use Azure services we need to have an account and subscription.

We’re able to have multiple subscriptions connected to the same account. Depending on the purpose, it can be subscription that we use for business, for marketing, learning etc.
It’s also great for resources and bill management purposes. We can monitor and control our spendings.
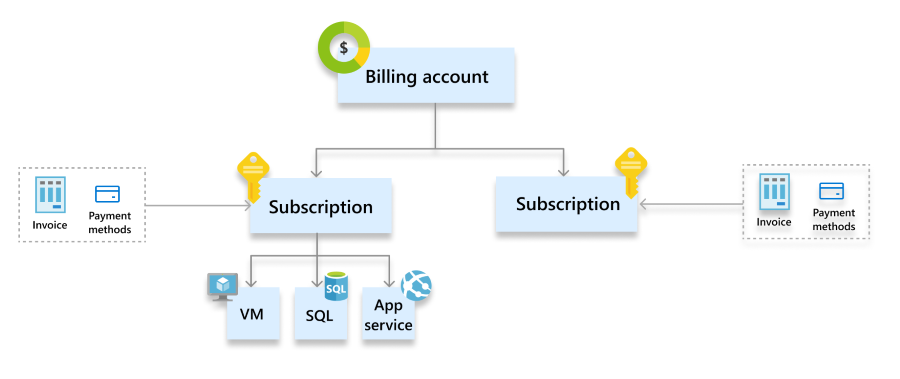
| Concept | Description |
|---|---|
| Billing account | Represents an agreement that a customer accepts to use Azure. It contains one or more subscriptions. |
| Subscription | Represents a grouping of Azure resources. Invoice is generated at this scope. Other billing information such as payment methods and usage address is associated to this scope. |
We can purchase Azure access directly from Microsoft directly on a website, through a representative or through a partner. There are plenty of free options and discounts available.
Ok, let’s explore the options.
Subscriptions
Everything boils down to the following options (and benefits):
-
Option 1 (Azure free account - never used Azure, first time creating Azure account)
- 30 days or 200$ credit - whichever we reach first + 40+ always free services
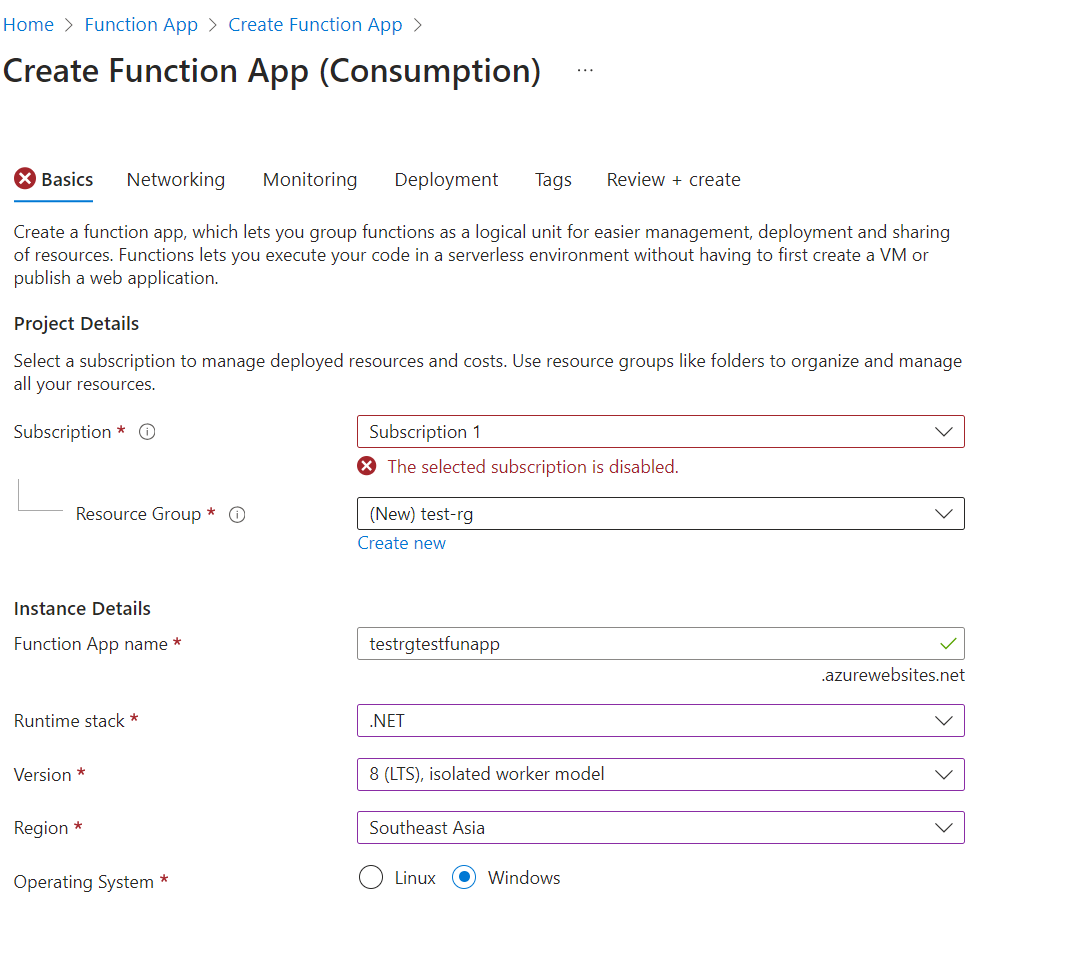
- Important note here: If you don’t move to pay-as-you-go pricing after spending your $200 credit or after your first 30 days, you won’t be billed for anything, but your account and services will be disabled. Even if you try to provision some of the free services you will get a message that “The selected subscription is disabled”. For instance in case of Azure Functions (which are considered always free, as we can have 1 000 000 requests monthly free in Consumption tier) you would get the same:
- If you move to pay as you go, you’ll only be charged for services that you use above the free monthly amounts. This would mean that you are able to overrun the limit of 200$ until account is disabled. So be careful with the usage of resources. More info on how to avoid charges with Azure free account here
-
Option 2 (Visual Studio license) Depending on the Visual Studio license type we get up to 150$ monthly credits for Azure https://my.visualstudio.com/Benefits
-
Option 3 (Azure free student account)
- An offer for students that gives $100 credit and free developer tools. Also, you can sign up without a credit card.
-
Option 4 (Pay-As-You-Go)
-
Pay for what you use. With that we get the following as well:
- Monthly free amounts of popular services for 12 months - At the end of the 12-month period, your account will be billed at the standard pay-as-you-go rates.
- The 12 months free services is available only to new customers who have not previously had an Azure account or received 12 months of free services. It is not currently available to customers who sign up directly for pay as you go in China and India.
- access to 40+ always free services
- Monthly free amounts of popular services for 12 months - At the end of the 12-month period, your account will be billed at the standard pay-as-you-go rates.
-
If we already signed up with Free Azure account we can do an upgrade
If you upgraded from an Azure free account offer, any remaining credits will be automatically carried over, but will expire 30 days from the date you created your Azure free account.
To do the upgrade, we need to go to the subscription and click upgrade button

Buy azure subscription
-
Which option to choose
- If you’re a student go for Azure free student account
- If you’re not a student, if you’re just starting with Azure go with Azure free account
- If you have Visual Studio subscription go with Visual Studio license option
- In case you used your free account option, you’re not a student and without VS subscription going for a pay-as-you-go option is for you.
Microsoft Learn sandbox
There is another way. Sandbox allows us to have Azure experience at no cost.
That’s the technology that creates a temporary subscription that’s added to our Azure account. Allows us to create and manage resources for learning purposes. After we complete the module, resources are cleaned up for us.
To explore and get your first experience with sandbox visit Exercise - Explore the Learn sandbox - Training | Microsoft Learn
Ok let’s create an account with free trial subscription.
Create Azure Free trial account - step by step
To be able to create/use Azure resources we would need some kind of a subscription. Before subscription we need an account, either Microsoft or GitHub account. When we navigate to portal.azure.com we are asked to either sign it with any of those, if we don’t have an account we can proceed by clicking Create one! After creating an account we will be redirected to azure portal.
To get familiar with the portal we can visit Quick start where you will learn to navigate through portal, customize it to your needs and important areas you should know.
There we can create a subscription and connect it with our account.
Once we’re in the portal, we can use search functionality to search for subscriptions:
 After clicking
 Subscriptions we will navigate to subscriptions connected to our account. As we didn’t create any, we can click Add.
Then we will be seeing something like this:
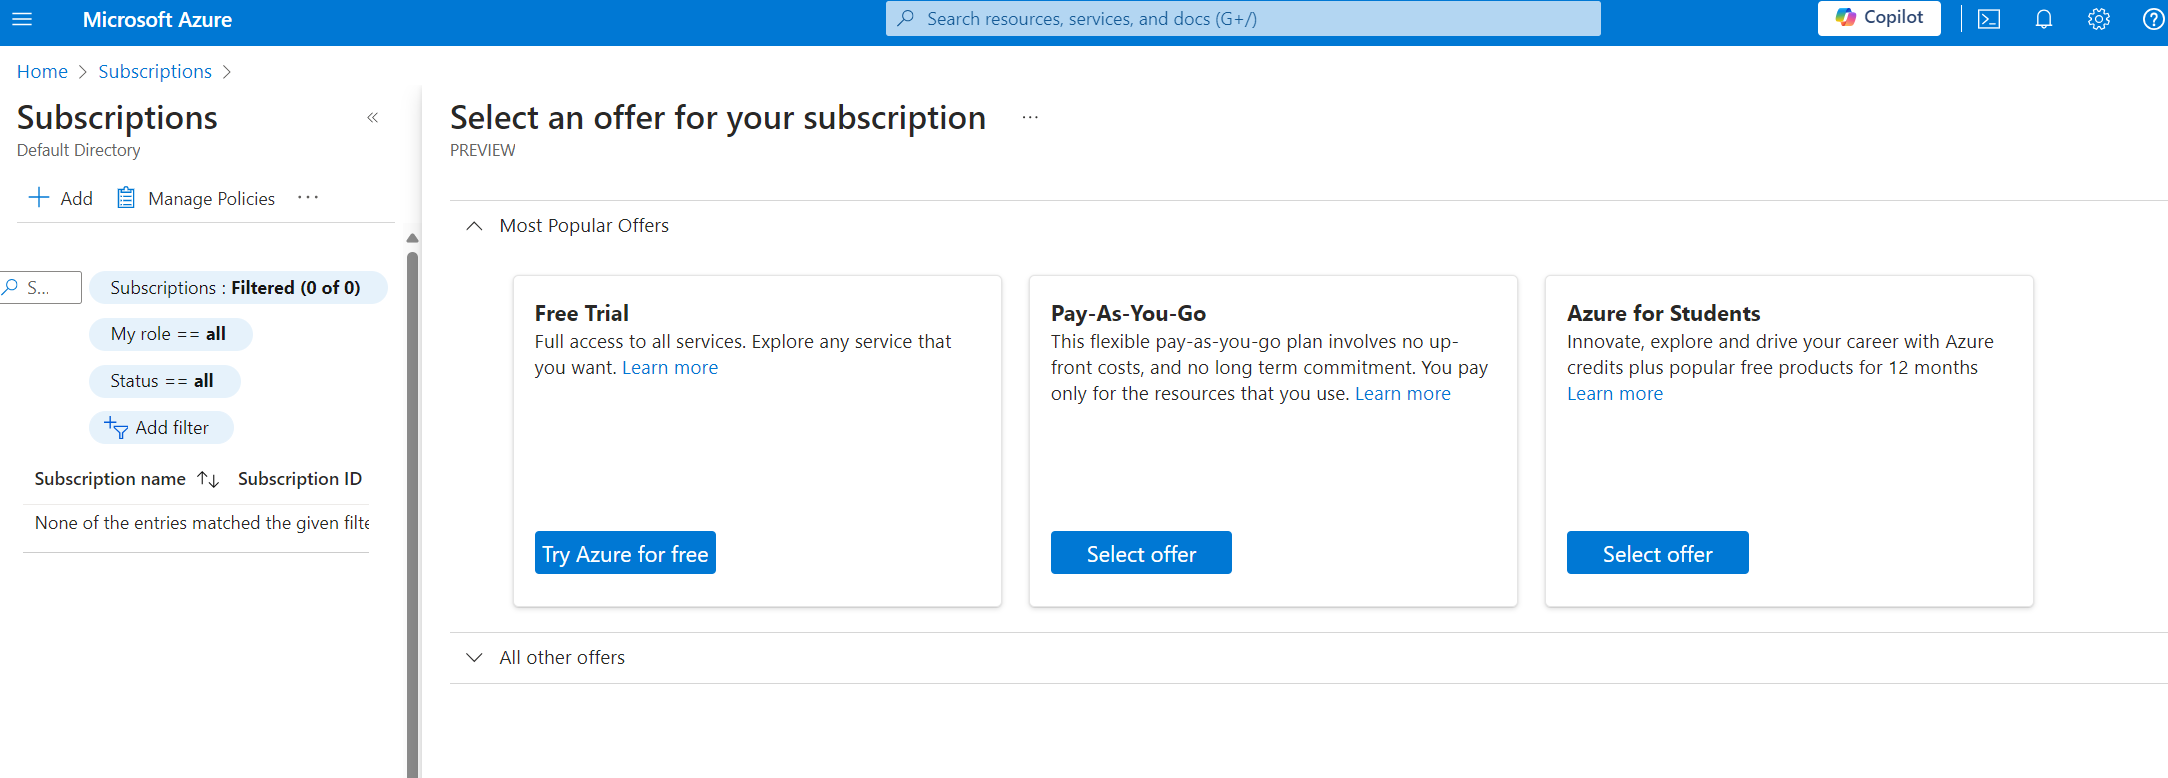 As we want Free trial we should click
 Try Azure for free. And we get redirected to signup.azure.com
where we:
- enter our details
- verify our identity either by getting a text or a call
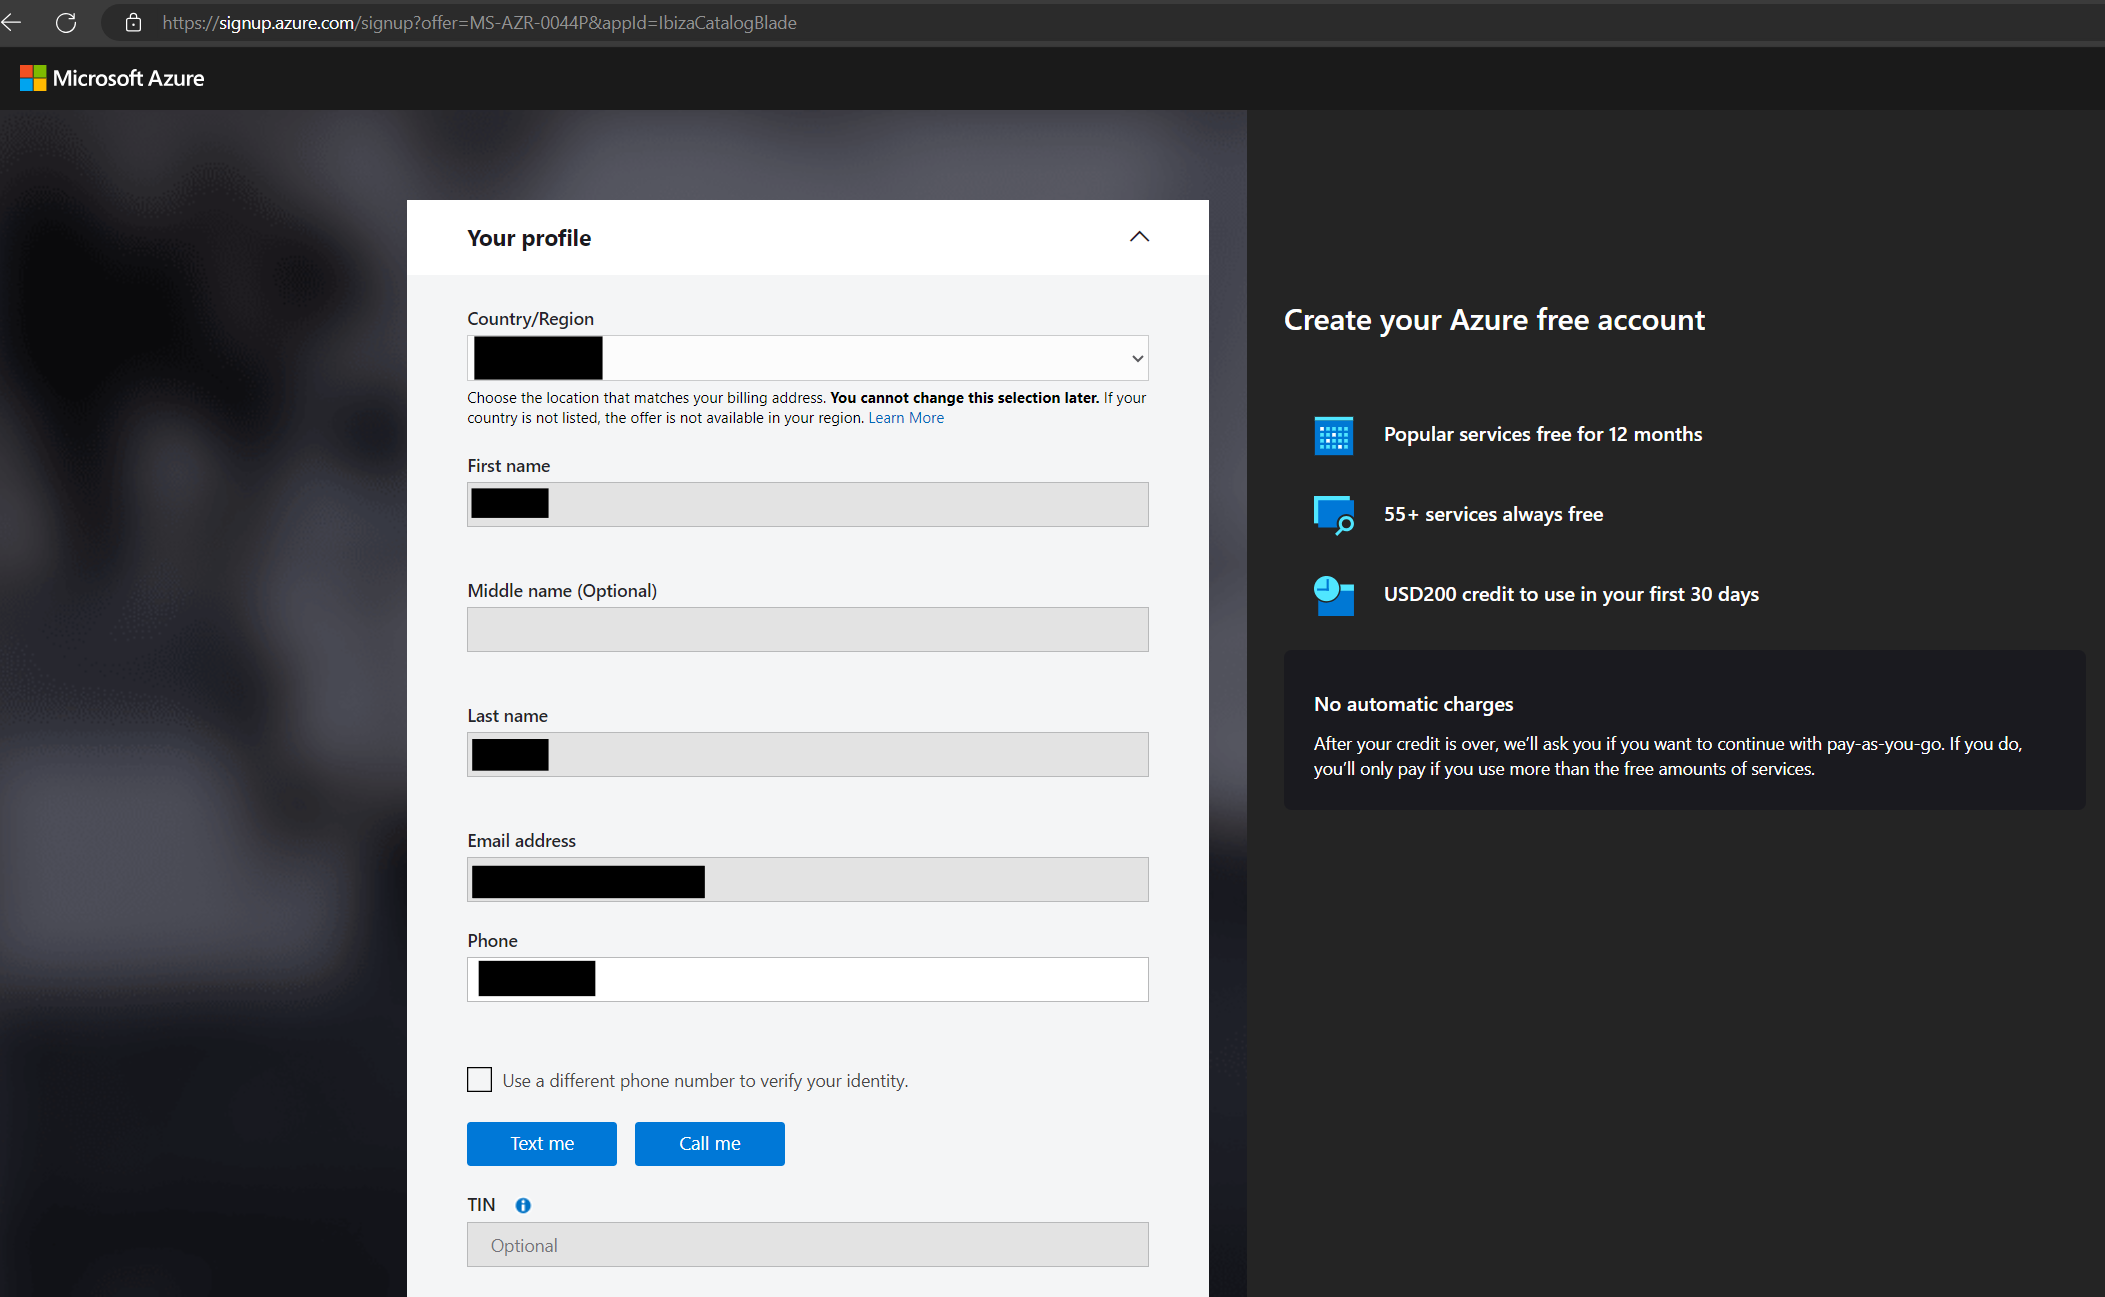 And by clicking Next we get to add our bank card details.
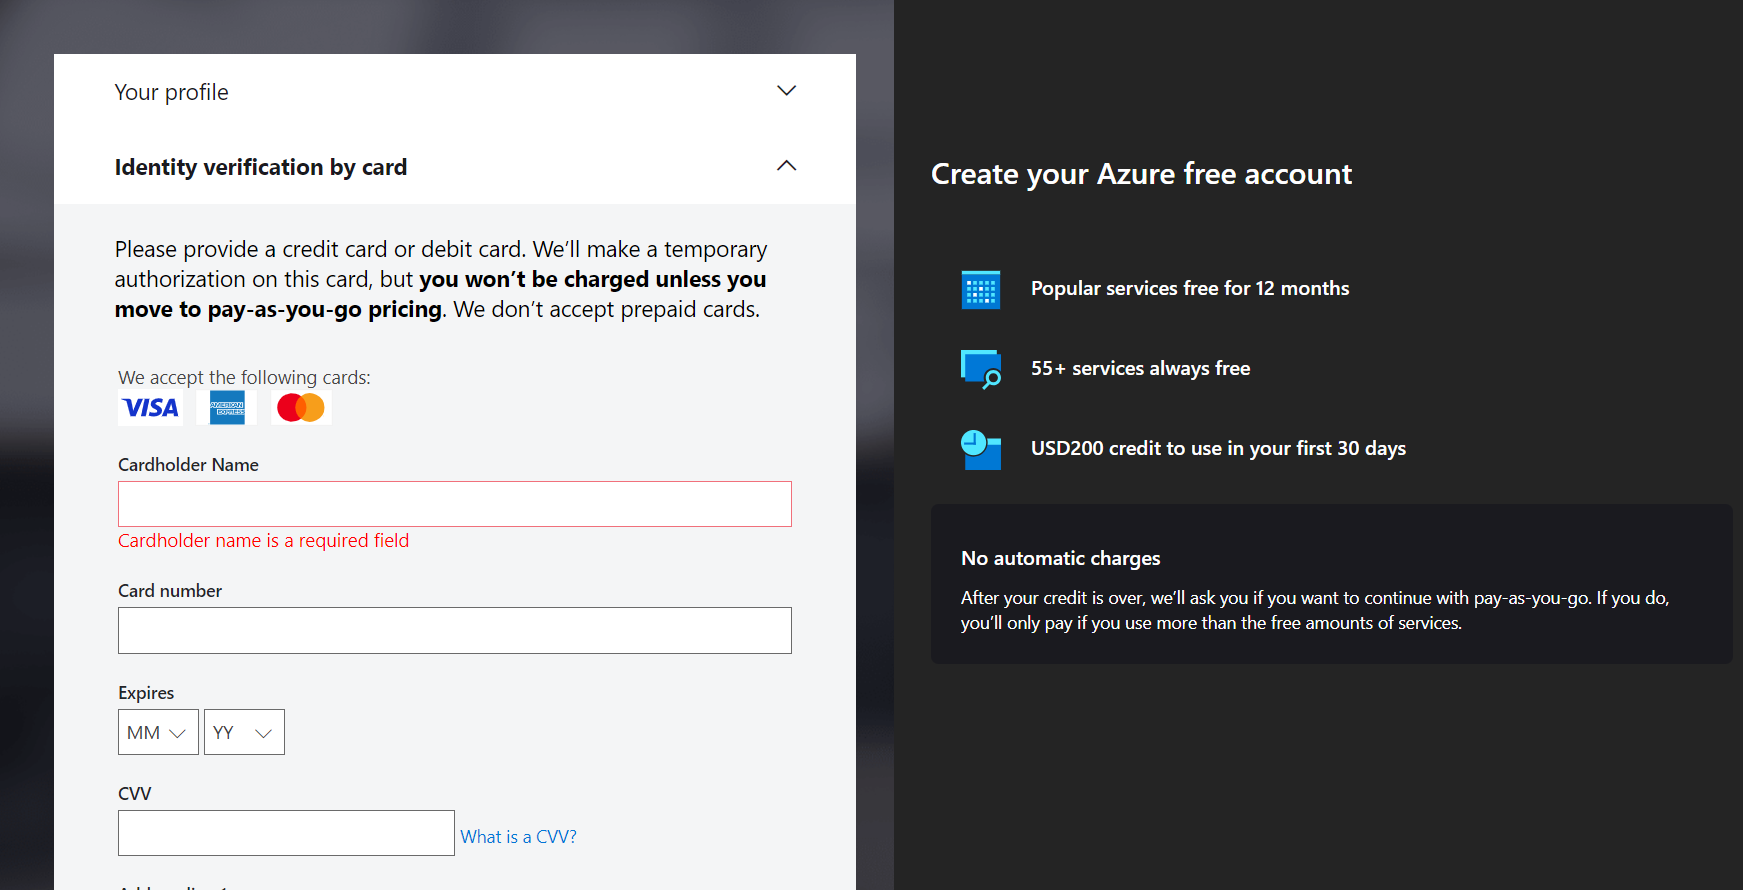 Important detail for us to catch:
 - you won’t be charged unless you move to pay-as-you-go pricing
So Microsoft verifies that your card is valid but won’t do any charges on it as long as we’re on the free trial account.
Once we finish with this we will be redirected to Azure Portal. When we check our subscriptions again, we will see one created with the name “Subscription 1”. That’s something that we can easily change, by navigating to the subscription and selecting Rename
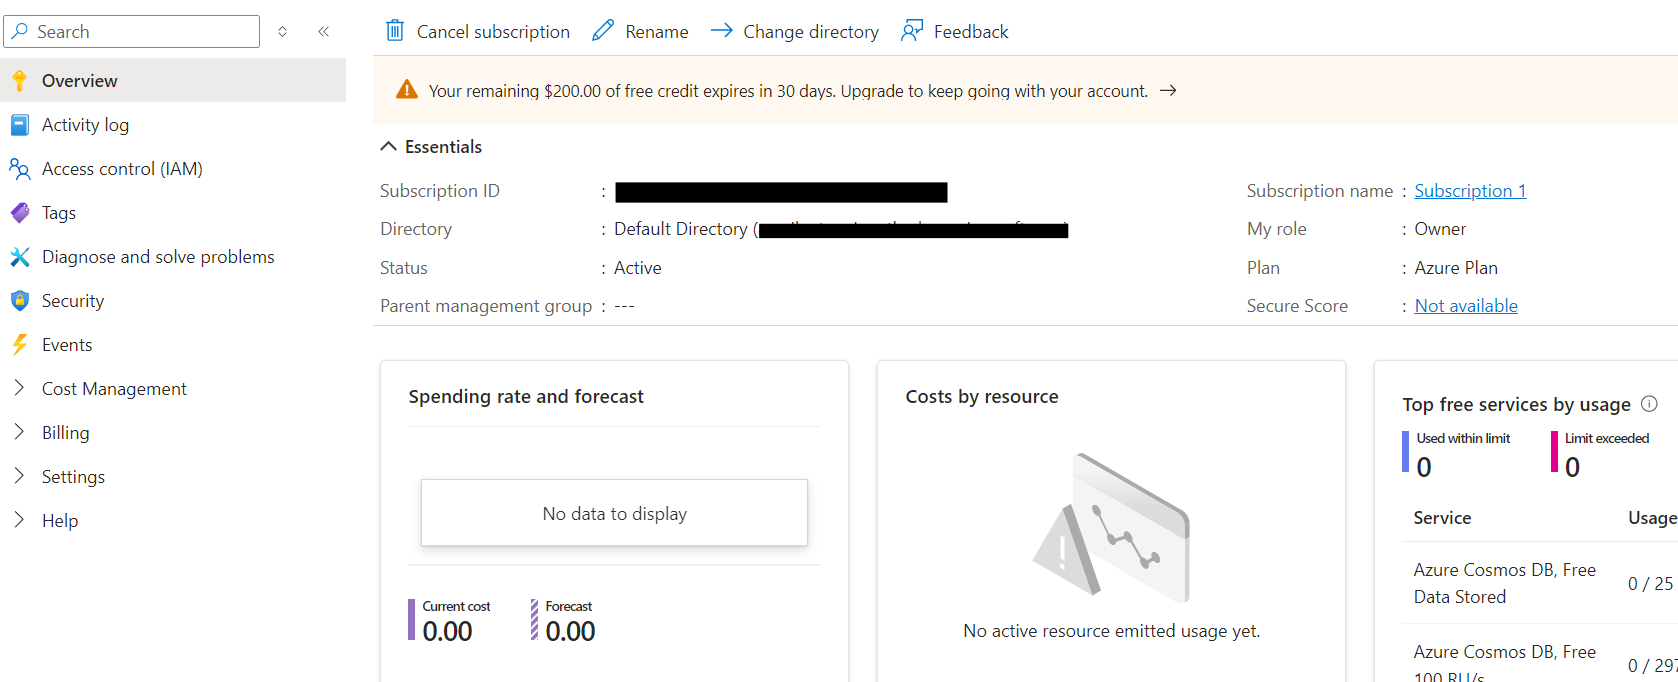 We’re all set! Our free trial account is ready.
Coming up next
Ok, bravo for us! We have an account, with the active subscription. Let’s dive into the fundamentals of Azure.
Stay tuned :)